Compositing Realistic Heat Distortion In Nuke
Whether you're compositing roaring jet engines, scorching desert dunes, or even a shimmering magical energy, a convincing heat distortion effect will often come in handy…
Whether you're compositing roaring jet engines, scorching desert dunes, or even a shimmering magical energy, a convincing heat distortion effect will often come in handy…
Heat distortion is one of those effects that every compositor will create at some point in their career.
But many don't quite make the effect look realistic in their shots.
To composite convincing heat distortion, it's very useful to first understand it. In this article, we’ll take a closer look at what heat distortion is, break down the individual components of the effect, and go through 10 tips for adding heat distortion to your composite.
What Is Heat Distortion
Heat distortion is a type of mirage – an optical phenomenon caused by complex refraction of light through the air.
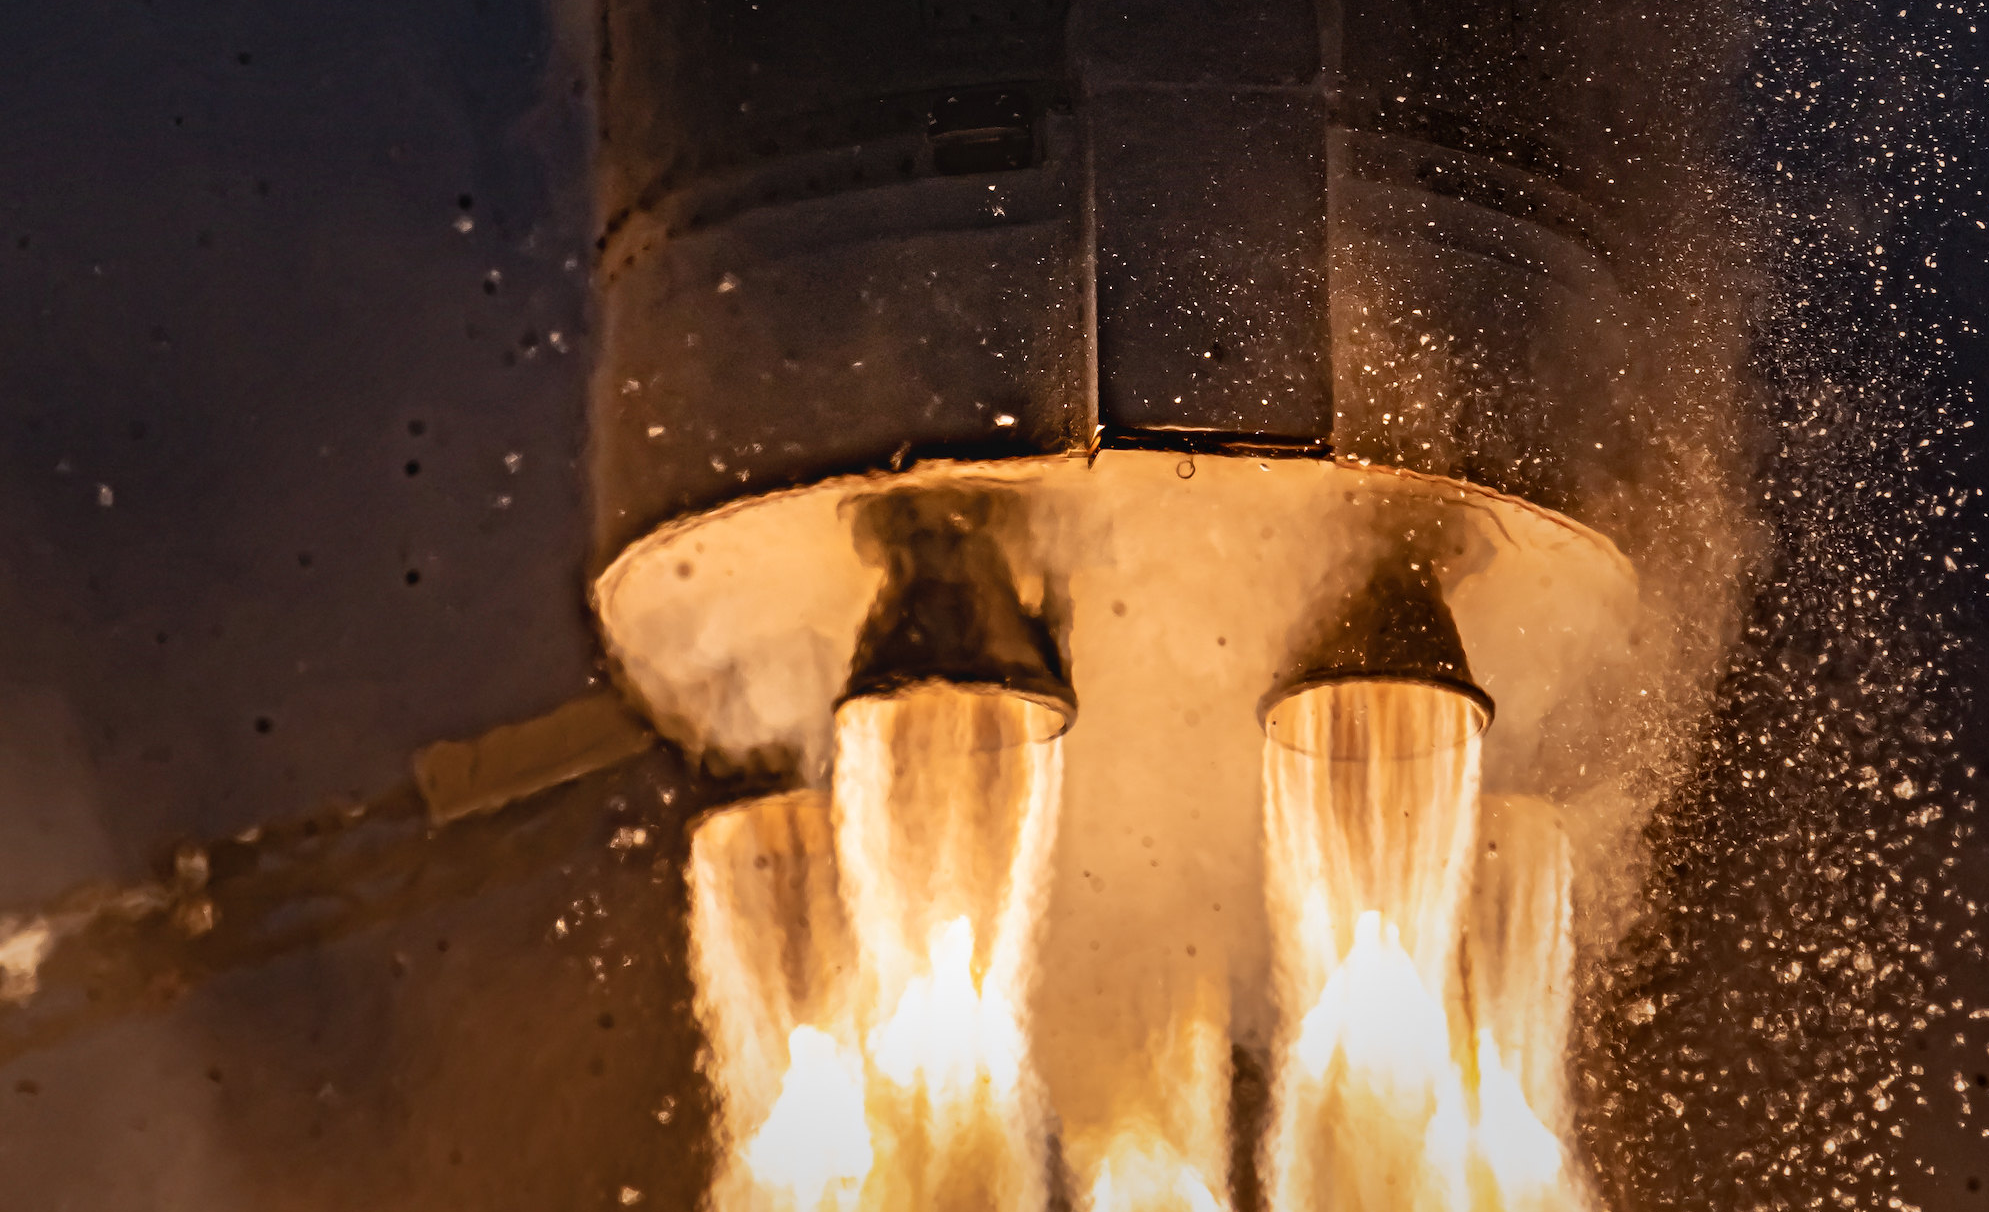
Extreme heat from an array of rocket engines is distorting the image.
Refraction is the redirection of a wave as it passes from one medium, or material, to another.
In this case, the wave we're talking about is a light wave, and the media that affect the direction of the light wave are for example air, water, or glass.
It takes longer for a light wave to propagate through media with a higher optical density.
And so waves that are entering or exiting a denser medium at an angle get refracted, and the path of the light is bent towards the denser medium. – Because slowing down one side of a wave will cause the other side of the wave to be pulled towards it.
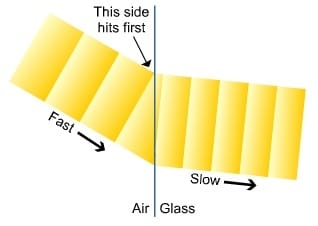
When light enters a more optically dense material like glass, the light that hits the object first, slows down first. This causes the light to bend.
When travelling through air, light refracts differently depending on the density of the air. And the density of the air depends on its temperature (and the atmospheric pressure). Since cold air is denser than warm air, the light rays are bent towards the cold air while passing through the two.
Light is bent as it passes through layers of air with different temperatures.
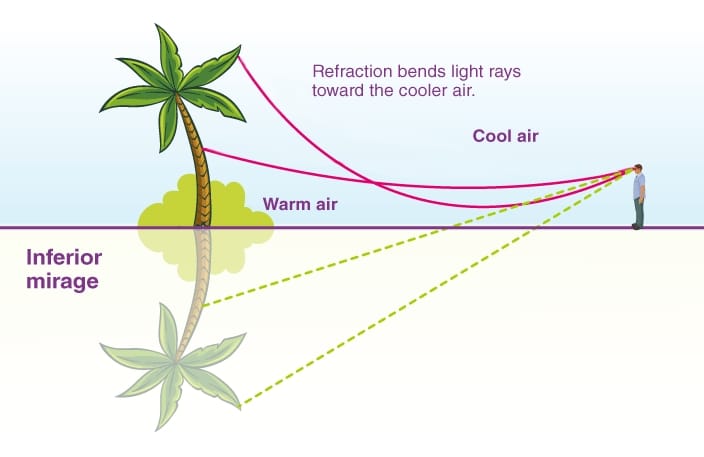
In the illustration above, light rays from the sun bounce off the palm tree and continue through the air. Because of the difference in air temperature (warmer air near the ground, and cooler air higher up), the rays are bent up and toward the viewer.
From the perspective of the viewer, the bent rays seem to be coming from below the palm tree. And so the viewer sees what appears to be a reflection of the palm tree – an inverted image below it. This is called an inferior mirage.
In the more frigid regions of the world, where the ground (or water/ice) is colder than the air above it, you may instead see a superior mirage – where the exact opposite happens. The inverted image shows up above the object you’re viewing.
And where the air density changes both up and down within an atmospheric duct, you may see the fabled Fata Morgana – which further tricks your eye by squashing, stretching, inverting, blending, and rapidly changing multiple images stacked on top of one another. Often, to the point of making the object (e.g. a ship at the horizon) unrecognisable.
All of the phenomena above are caused by the complex refraction of light through the air. And, as mentioned at the beginning, that is also the basis for heat distortion.
When the temperature difference is significant, layers and pockets of hot air move around in, mix with, and rise through cold air. Then, the hot air cools down and sinks, to be heated again.
This constant, turbulent movement of hot and cold air bends the light going through it multiple times, and the result is visible heat waves.
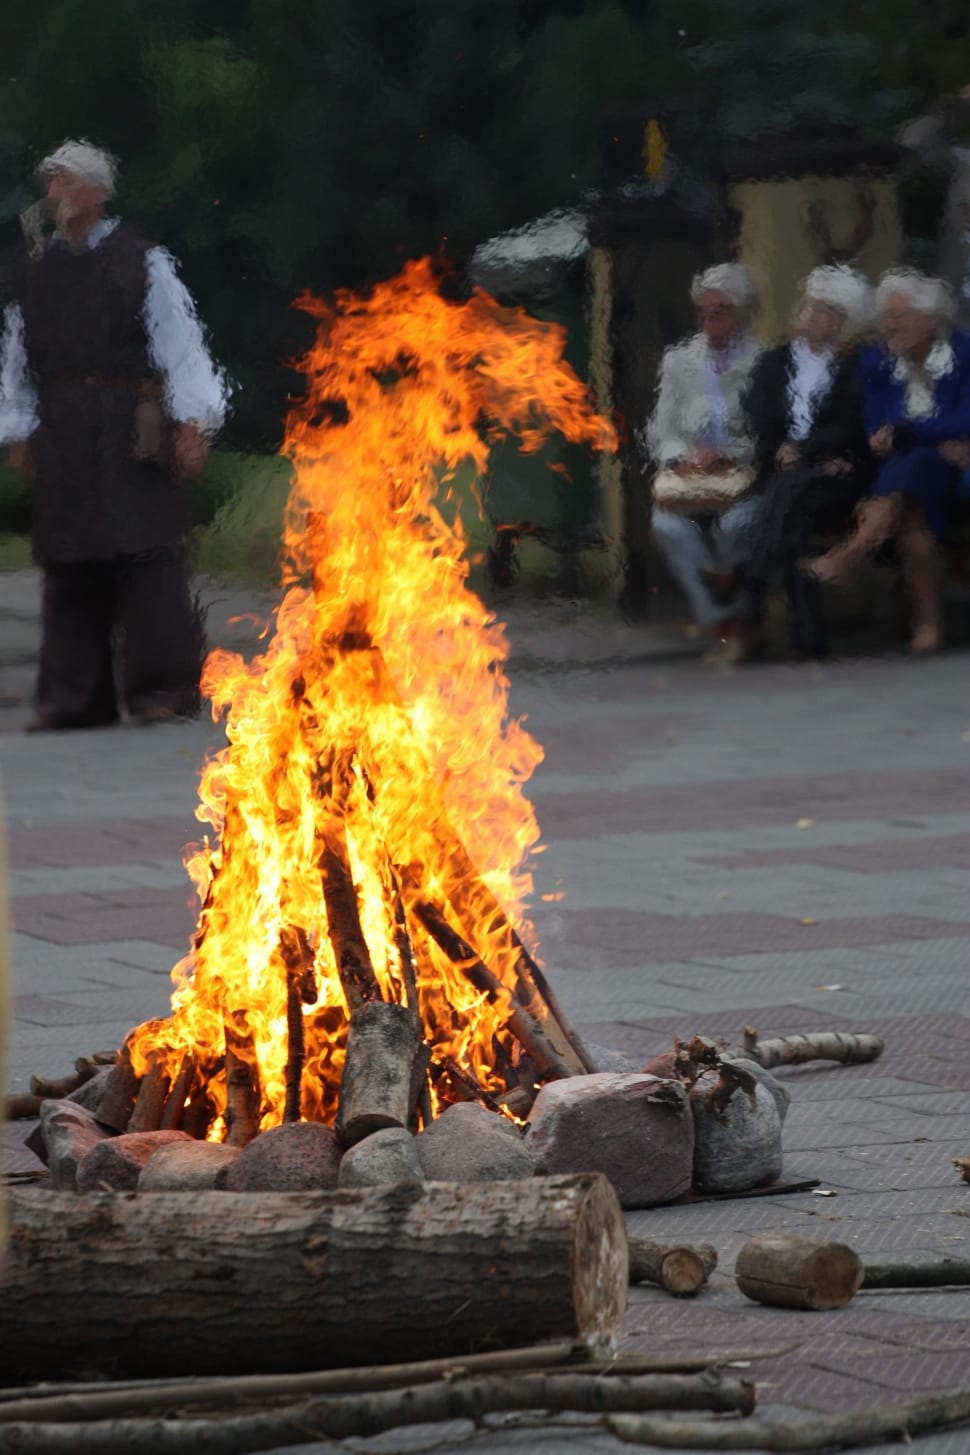
Heat distortion from a fire. The jumbled, refracted light obscures the background.
The greater the difference is within or between the medium/media (in this case; the larger and the more turbulent the temperature difference is between the hot and cold air), the more the light gets refracted. – Which means, the stronger the heat distortion, and the more the background that's seen through the distortion gets obscured.
So a gently sunkissed meadow in spring will display a much less intense heat distortion than a blazing campfire on a cold winter’s day. You’ll also find the distortion effect is stronger close to the source of the heat (where the difference is the greatest). For example, hot asphalt will cause a road to look like shimmering water, while the background seen through the air above the road will look less distorted.
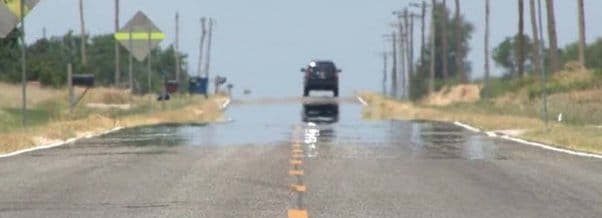
Heat distortion along the surface of a hot road. Light from the sky – initially pointing down towards the ground – is bent through the air and appears to originate from the road instead, in a turbulent inferior mirage.
The source of the heat, and any forces affecting it (like wind), will dictate the general direction of the heat distortion. For example, in the desert, warm air will rise up from the sand. However, a jet engine will pump out hot air in a specific direction.
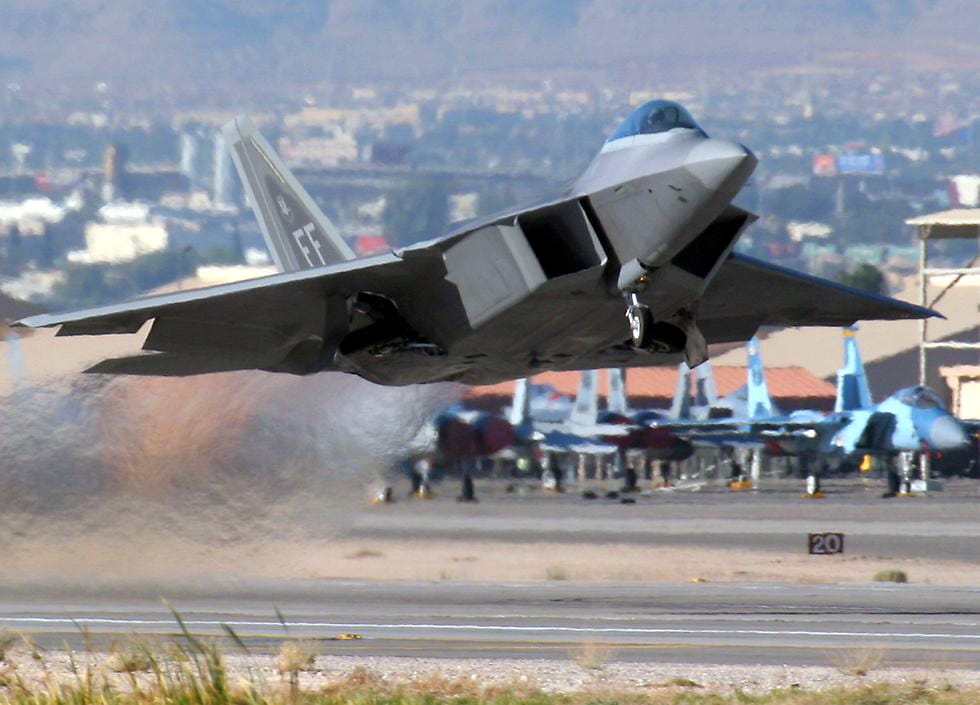
Heat distortion behind a fighter jet. The intense heat almost completely obscures the background.
Air passing through a jet engine also moves extremely fast, which increases the frequency, or the apparent speed, of the distorting heat waves. (Compared to, for example, a candle).
And the size and number of air pockets will vary based on the source of the distortion and its surrounding environment, which changes the look of the distorting heat waves. (With screen size also varying based on the distance from the camera and the focal length).
So there are quite a few properties associated with heat distortion.
How To Make Realistic Heat Distortion
Let's sum up what you need to recreate in order to generate convincing heat distortion:
- Turbulent, wavy distortion that's warping the image.
- Variable distortion across the image (pockets of hot and cold air).
- Adjustable overall strength (or amount) of distortion.
- Adjustable size of the distortion (i.e. number of air pockets).
- Adjustable frequency or ‘speed’ of the distortion.
- Adjustable direction of the distortion.
- Adjustable wind speed (or other directional force).
- Adjustable obscuring of the image (i.e. more heavily obscured in more densely distorted areas).
When creating a heat distortion setup, a few nodes will do all the heavy lifting.
To distort the image, you can use either the IDistort node or the STMap node. To drive the distortion, you can use the Noise node (with some modifications to turn it into appropriate vectors). And to obscure the background, you can use the iBlur gizmo (or a similar tool) masked by the noise.
With a little bit of a support structure around them, you can animate and mask these nodes, and hit all of the requirements listed above.
To avoid reinventing the wheel, here is a great tutorial that shows the fundamentals of creating a heat distortion setup:
Creating heat distortion using the IDistort node.
And you can find an excellent implementation of the heat distortion techniques in the HeatWave tool by Damian Binder, which uses the STMap method.
Finally, armed with all of the information above and the right tool for the job, let’s get into the compositing side of things:
10 Tips For Compositing Heat Distortion
These are some things to be aware of when adding heat distortion to your comp.
1. Over Exaggeration
Heat distortion is often smaller in scale and less prominent than you might think.
Reference images of heat distortion are usually shot on telephoto lenses and/or are cropped in to show the effect more clearly. And so it's an easy mistake to match your image to those references exactly, and accidentally over exaggerate the effect.
However, unless your shot camera is right up close to a fire or other heat source (or the image was shot on a telephoto lens) – and maybe even still then – subtle is usually the way to go when it comes to adding heat distortion.
2. Containment
Like described earlier, heat distortion is usually strongest near the source of the heat.
It may grow weaker further away from the source, and the effect may not necessarily apply to the whole frame.
And so make sure to mask the distortion as needed. (You can even heat distort the mask as well).
When you do, make sure to mask the distorting node itself as opposed to Keymixing the original image over the distorted image or vice versa. That way, you'll get more natural edges along the distortion effect, instead of ghosting double-edges.
That’s also the reason for using the iBlur gizmo or similar in order to obscure the background. Simply masking a Blur node would create issues in the semi-transparent areas.
3. Smeared Grain
Warping the image using heat distortion destroys the grain.
Make sure to regrain as needed.
4. Letterbox Contamination
If your plate has a black letterbox, make sure the heat distortion isn't pulling the black edges into your image.
You can add a Crop node before the heat distortion, adjust it to crop out the letterbox, and untick black outside. That will repeat the top and bottom rows of colour pixels out into the letterbox area and fix the problem.
Then, just copy the Crop node, put it after the heat distortion, and tick black outside to restore the letterbox.
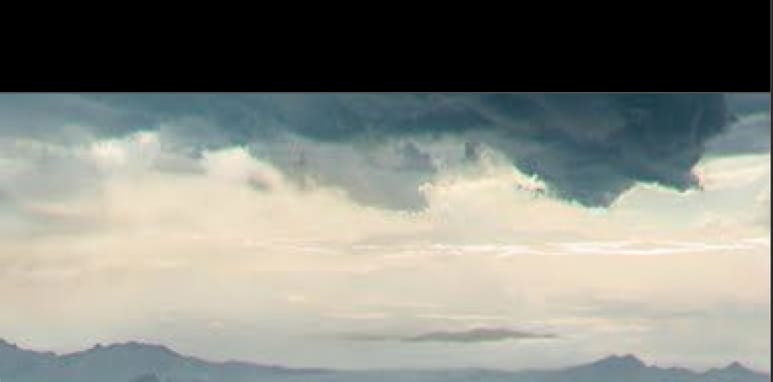
Stretching the letterbox out (zoomed in at the top screen right corner of the image).
5. Tracking
Heat distortion is a 2D effect, and can sometimes look odd with significant camera moves.
Make sure to track the Noise pattern as needed.
If you do and the heat distortion still looks a little bit 2D or stuck onto the screen, you can create 3D noise and use that to drive the distortion.
6. Layers/Channels
Remember to remove the vectors from your stream when you're finished distorting the image.
Add a Remove node after your heat distortion and remove the relevant layers/channels.
That way, you keep your script tidy and efficient downstream.
7. Abnormal Values
Blurring and distorting pixels with NaN or INF values can make the problem worse.
Instead of having for example a single pixel with an abnormal value in your image, suddenly you have a cluster of corrupted pixels because the heat distortion smears/spreads the values out.
So make sure to apply any NaN/INF fixes before applying the heat distortion.
8. Nighttime Twinkle
Heat distortion also happens at night.
The sun doesn't have to be out, there just needs to be enough of a temperature difference in the air.
This can for example happen in cities, where there's traffic, vents, and other activity going on at ground level. It's partly why you see twinkling lights in a city skyline or in a starry sky at night.
You can add a very gentle, small-scale heat distortion on a nighttime city/sky DMP to get some subtle twinkling in the lights.
9. Magic And Other Effects
You can use, or adapt, the same heat distortion setup for other things as well.
For example, adding turbulent distortion to a magical effect to make it more forceful and visually interesting. By stretching out the noise size in one direction, you can create longer streaks of distortion, for instance.
Some other use cases:
- The Predator effect
- Glass distortion
- Wind effect
- Water ripples
- Window pane
- Distortion/glitch effect
- Force effects
- Lightning effects
- Watercolour style effect
10. Mirages
If you like, you can create the inferior and superior mirages mentioned earlier using heat distortion.
- Flip your image.
- Mask out the portion that you want to keep, for example a piece of the sky to go over a hot asphalt road.
- Add the heat distortion effect to it.
- Merge it over your original image.
Another interesting thing you can do is replace the iBlur in your setup with a TimeBlur.
That will pull adjacent frames into the image and can give more visual interest to the mirage effect.
Finally, where do you put heat distortion in your composite?
The refraction associated with heat distortion happens to the light as it travels through the air. And so the light rays have already been affected before they hit the lens.
That means, heat distortion should be applied at the end of your comp – but before all of your lens effects, such as lens flares, vignetting, or chromatic aberration. And, as mentioned above, definitely before the grain.
I hope you found this tutorial useful. For more Nuke tips & tricks, see Nuke.


