Snapping Cards To A Position Pass In Nuke
A very useful technique for quickly and accurately placing Cards around in a 3D scene…

A very useful technique for quickly and accurately placing Cards around in a 3D scene…
I recently saw this video by Arvid Schneider which reminded me of a very useful technique I would like to share for easily positioning Cards around in a scene.
Just by colour picking the world position pass of the CG render, you can snap Cards into place exactly where you want them in 3D space.
Colour picking a position pass to move a Card into place.
Let's take a look at how it works.
World Position Pass
A world position pass is just the X, Y, and Z coordinates of objects in the scene in relation to the scene's origin – given for each pixel in the image – in the R, G, and B channels, respectively.
Which means, for every pixel you have the exact position in 3D space for the object in that pixel.
And so if you want to place a Card at a specific point in space, for example against a wall in your CG render, you can simply copy the RGB values at a pixel in that area of the position pass and paste them into the Translate XYZ values of the Card.
The Card will then snap to exactly that position in 3D space.
We can make this process super simple:
Colour Picking The Position
First we need a node with a colour picker knob.
You can use any node you want that has a colour picker already – like for example an Add node – or you can make your own:
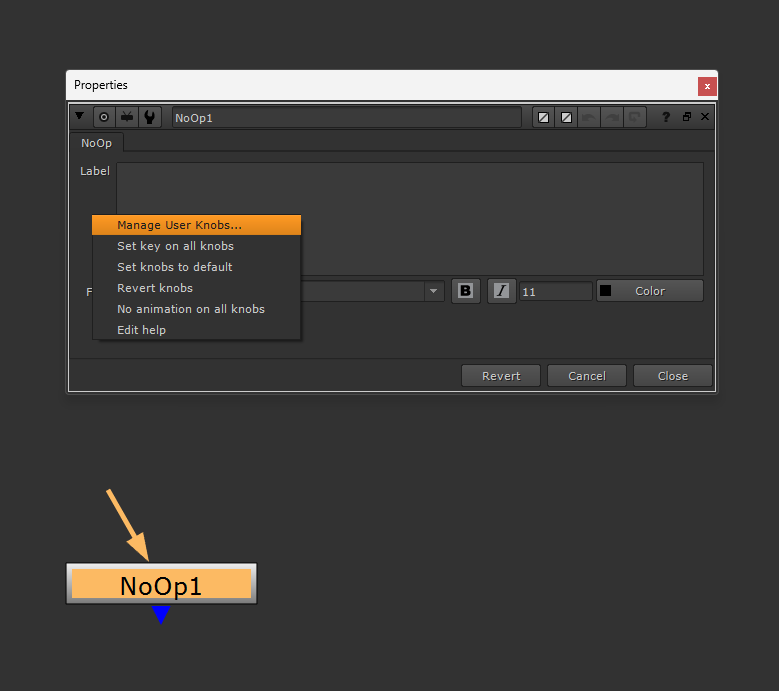
Create a NoOp node and right-click its properties → Manage User Knobs.
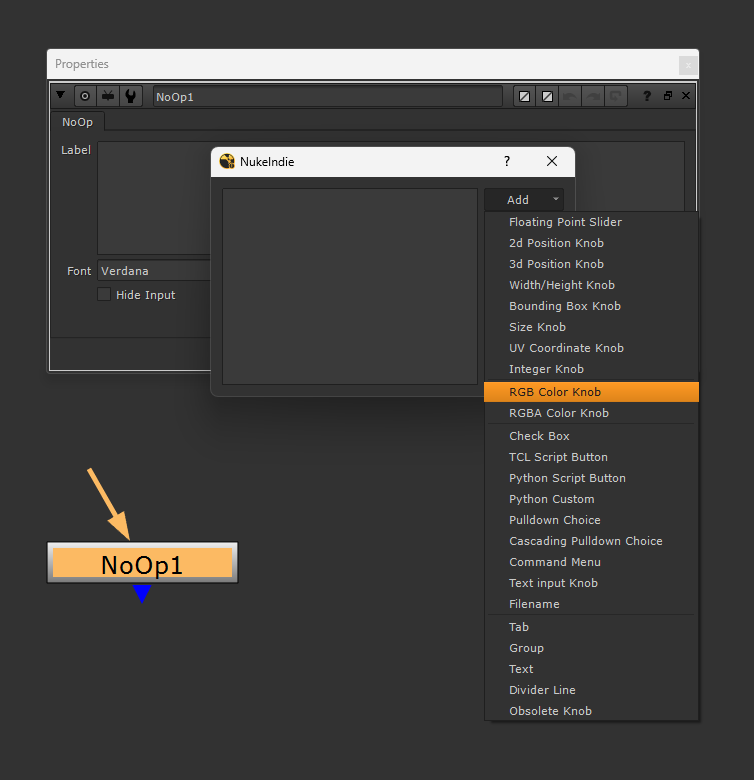
Click the Add dropdown menu and select RGB Color Knob.
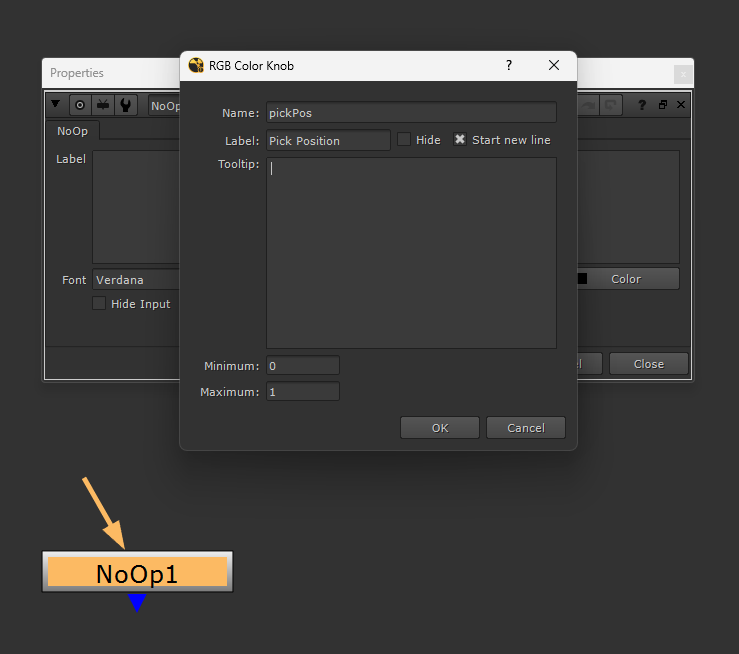
Name and label the knob something meaningful, for example pickPos and Pick Position.
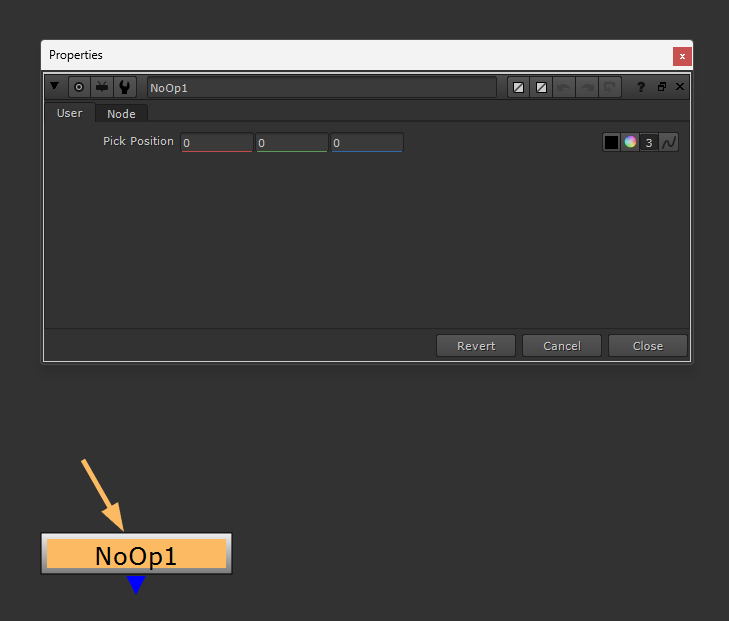
Hit OK and you will have created a NoOp node with a colour picker knob.
Next, create a Card and then expression link the colour picker's RGB values to the Card's Translate XYZ values:
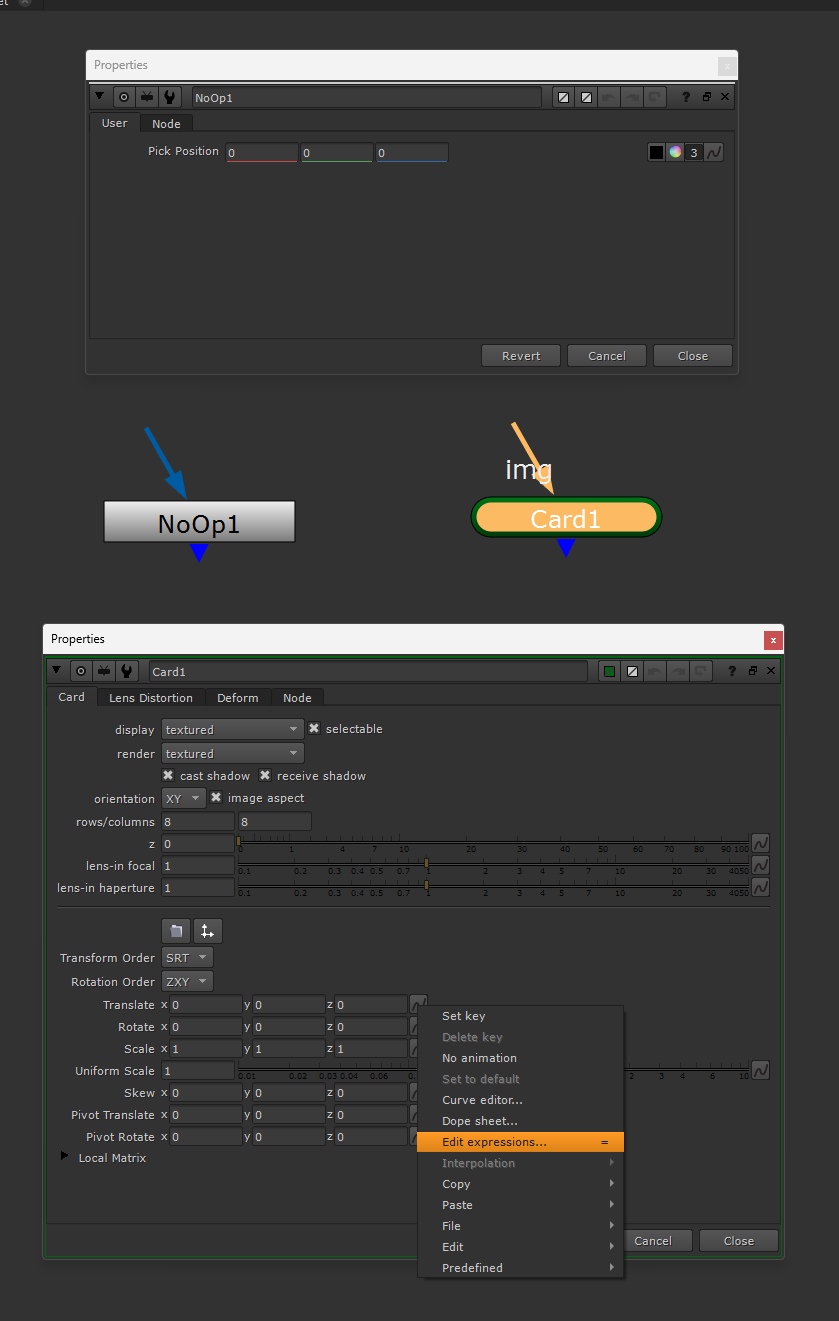
Create a Card and right-click on the animation menu next to Translate → Edit expressions.
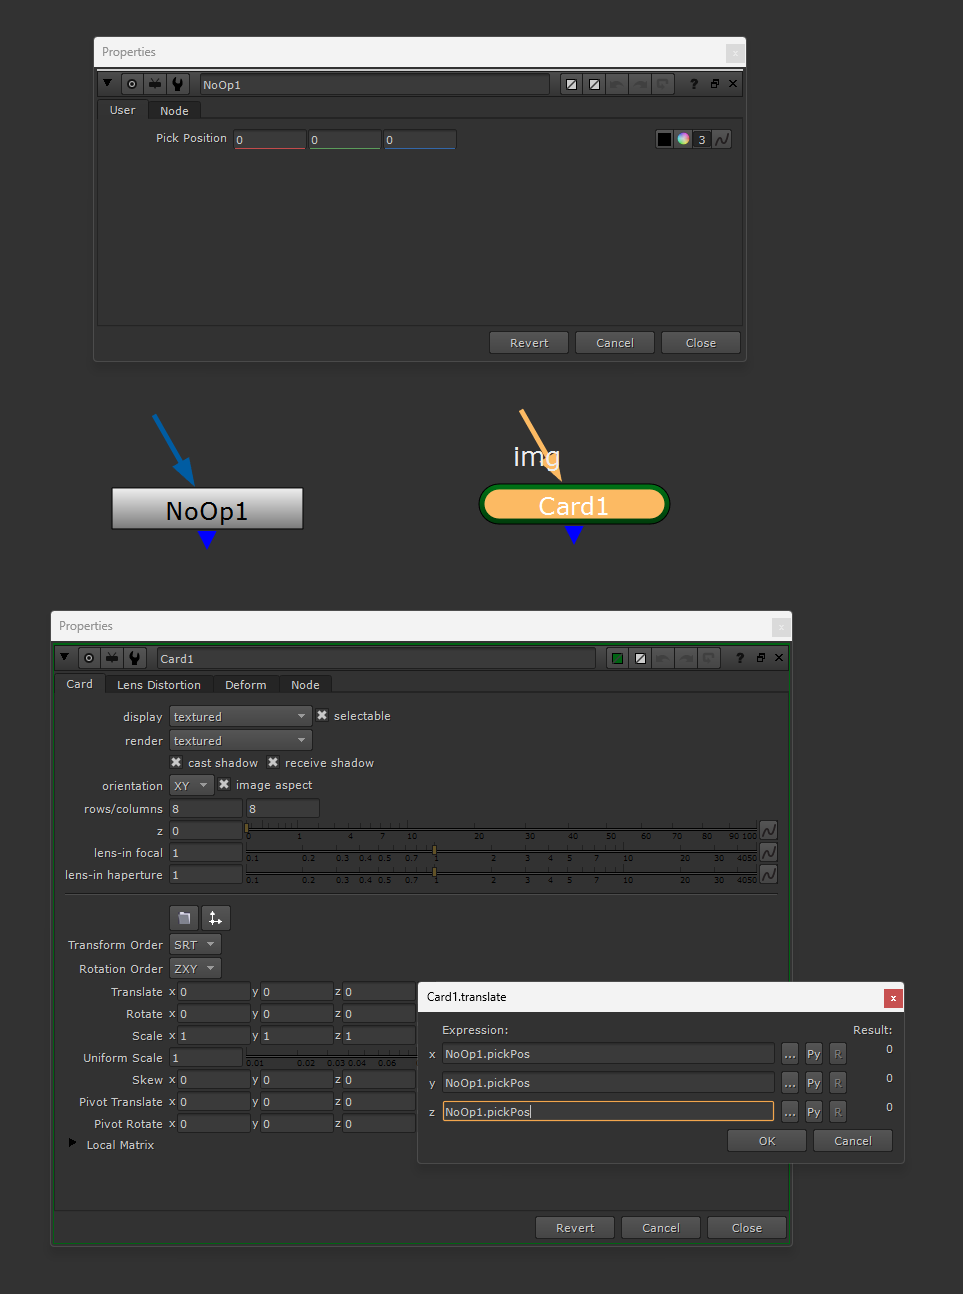
Add the expression: NoOp1.pickPos into all three x, y, and z expressions. (Replace NoOp1 with your node’s name, and pickPos with your colour picker’s knob name).
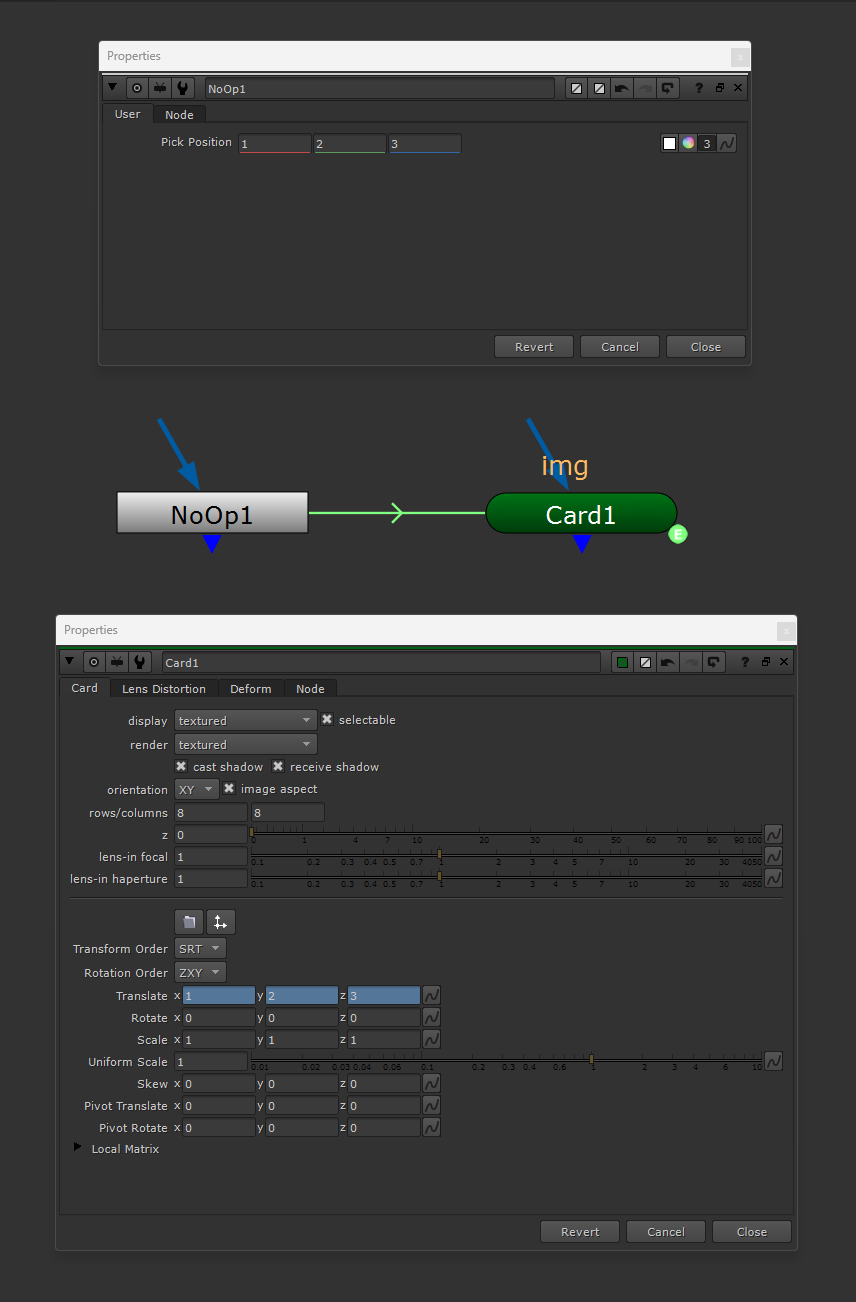
Hit OK and you should now have expression-linked the colour picker to the Card. Change the values in the colour picker to make sure the ones in the Card also change and match up.
Now you can view the world position pass in the Viewer, colour pick the area you want to move the Card to, and then the Card will snap into place.
Then, just adjust the rotation and scale of the Card to fit your needs.
You can copy/paste the setup as many times as you need, and colour pick each Card into place.
Quick and easy!
I hope you found this tutorial useful. For more Nuke tips & tricks, see Nuke.


