Secrets Of The Grade Node In Nuke
The Grade node in Nuke is fairly straightforward. However, some things are not explained very well, or at all, in the tooltips...
The Grade node in Nuke is fairly straightforward. However, some things are not explained very well, or at all, in the tooltips. Let us dive into the secrets of the Grade node, starting with the node indicators/decorators.
Node Indicators/Decorators
The node indicators/decorators make it easy to see what is going on in your Grade node at a glance. They are the icons on the Grade node itself, displayed in the Node Graph. Below is an image from Nukepedia which explains what each icon means:
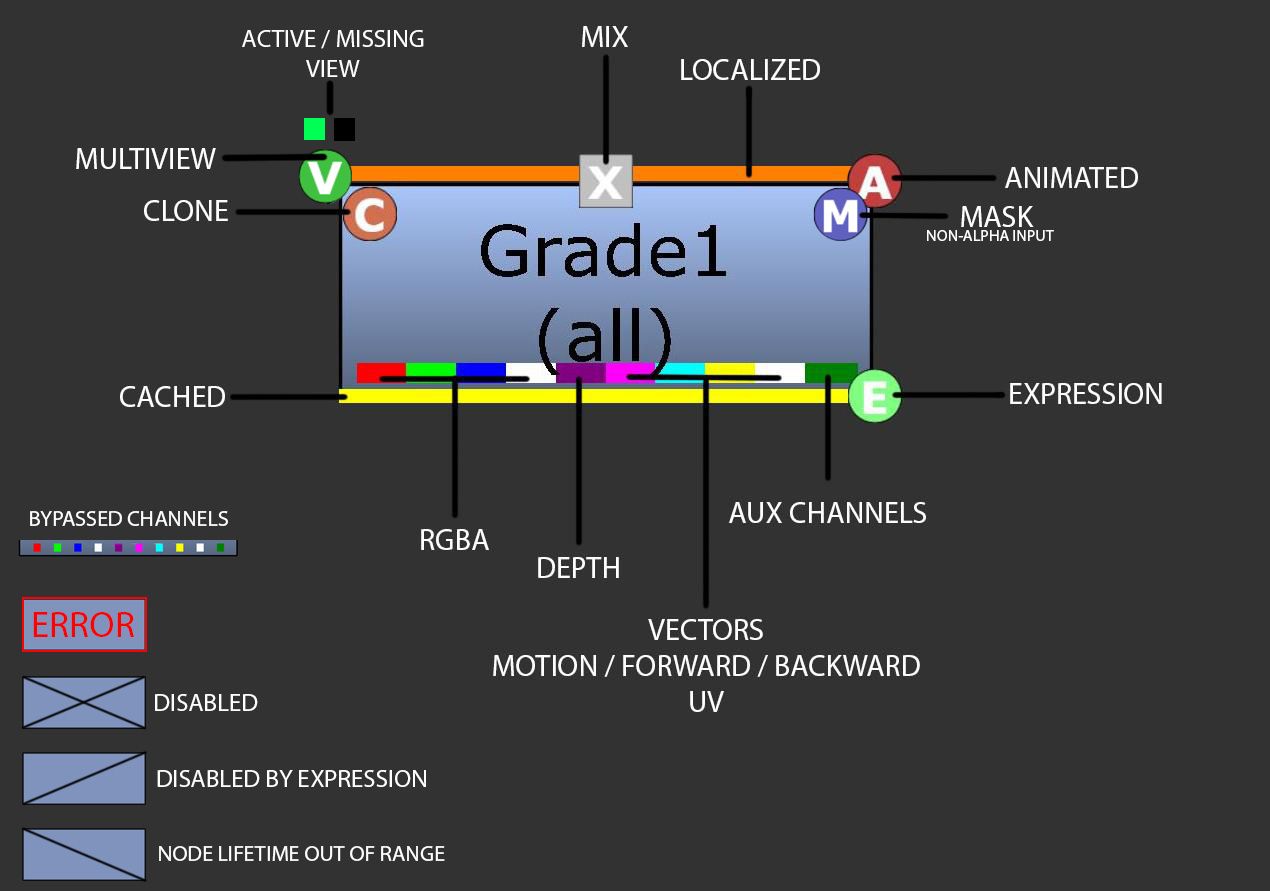
Credits: Frank Rueter & Nick Joseph.
While the node indicators/decorators do not show the values of your grades (although if you were so inclined you could add TCL expressions to the label for that), they do indicate many other useful things.
For instance, which channels are being processed by or passed through the node, if there are expressions linked to the knobs, when and how the node is being disabled, and more. The picture above quite neatly sums up the information that is communicated via the node indicators/decorators. And The Foundry's website explains each in more detail: Node Indicators.
Hidden Hotkeys
Next up, there are some hotkeys for manipulating the colour wheel that you may not have discovered yet. I find them to be very useful on a daily basis:
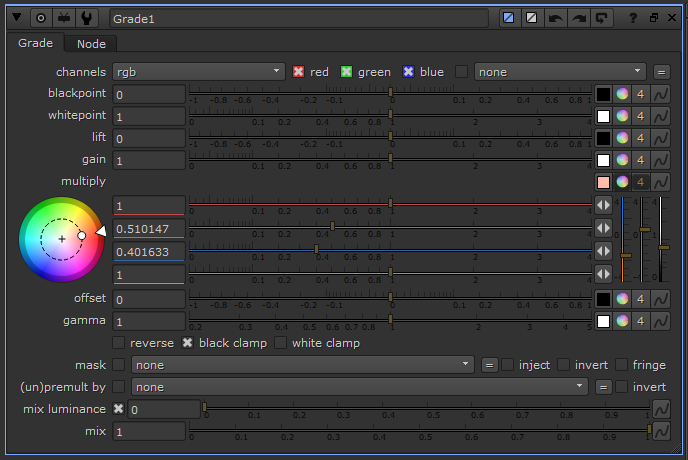
Adjust The Hue Only
Hold down Ctrl/Cmd and drag the Left Mouse Button to the right and left to adjust the hue, while keeping the saturation and the brightness locked. You will see a dashed circle appear on the colour wheel which will constrain the movement so that only the hue will be changed.
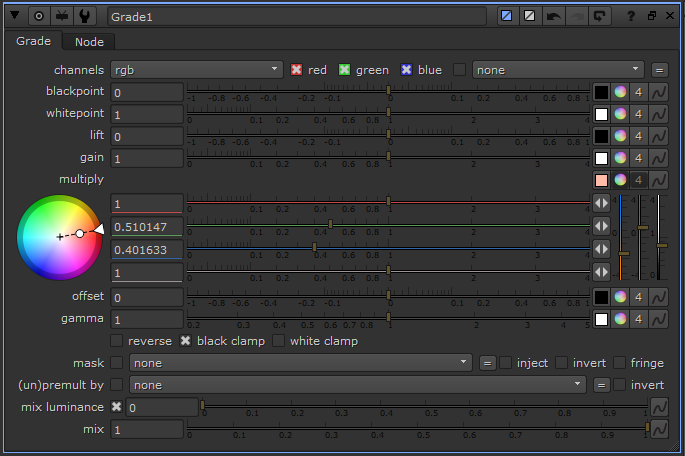
Adjust The Saturation Only
Hold down Shift and drag the Left Mouse Button to the right and left to adjust the saturation, while keeping the hue and the brightness locked. You will see a dashed, straight line appear on the colour wheel which will constrain the movement so that only the saturation will be changed.
Adjust The Brightness Only
Hold down both Ctrl/Cmd and Shift, and drag the Left Mouse Button to the right and left to adjust the brightness, while keeping the hue and the saturation locked. This time there is no dashed line, but as you drag your mouse back and forth you will see the colour wheel go brighter and darker.
I find this particular hotkey very useful for lifting the blackpoint (lift), or for adjusting the brightness without affecting the colour.
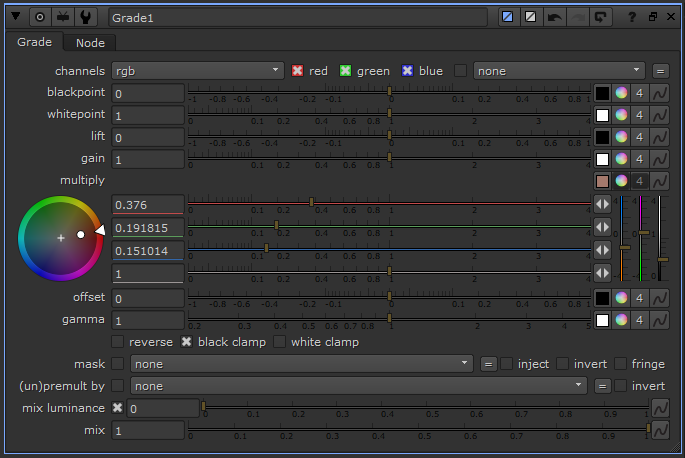
Fringe
Lastly, the lone wolf in the Grade node, fringe. What each of the knobs in the Grade node does, is explained fairly well in their tooltips. (Which you can access by hovering your mouse over a knob). Except for fringe.
In my opinion, "Use 4*(1-mask)*mask to mix." is not an artist friendly explanation of what the knob does. While the knob’s name itself is a clue as to what it is for, I think this knob could use a better explanation.
When enabling the fringe tick box, the grading is only mixed by the edges of the mask – the areas where the mask has grey values between 0 and 1. I.e. excluding the fully opaque areas with a value of 1 and the fully transparent areas with a value of 0. With fringe disabled, the grading is mixed by the entire masked area. I.e. where the mask value is above 0.
By connecting the following mask and ticking fringe, the grading would only be mixed by the thin area between the fully white and fully black values. (Partly marked with the red sample box). Effectively turning this mask...
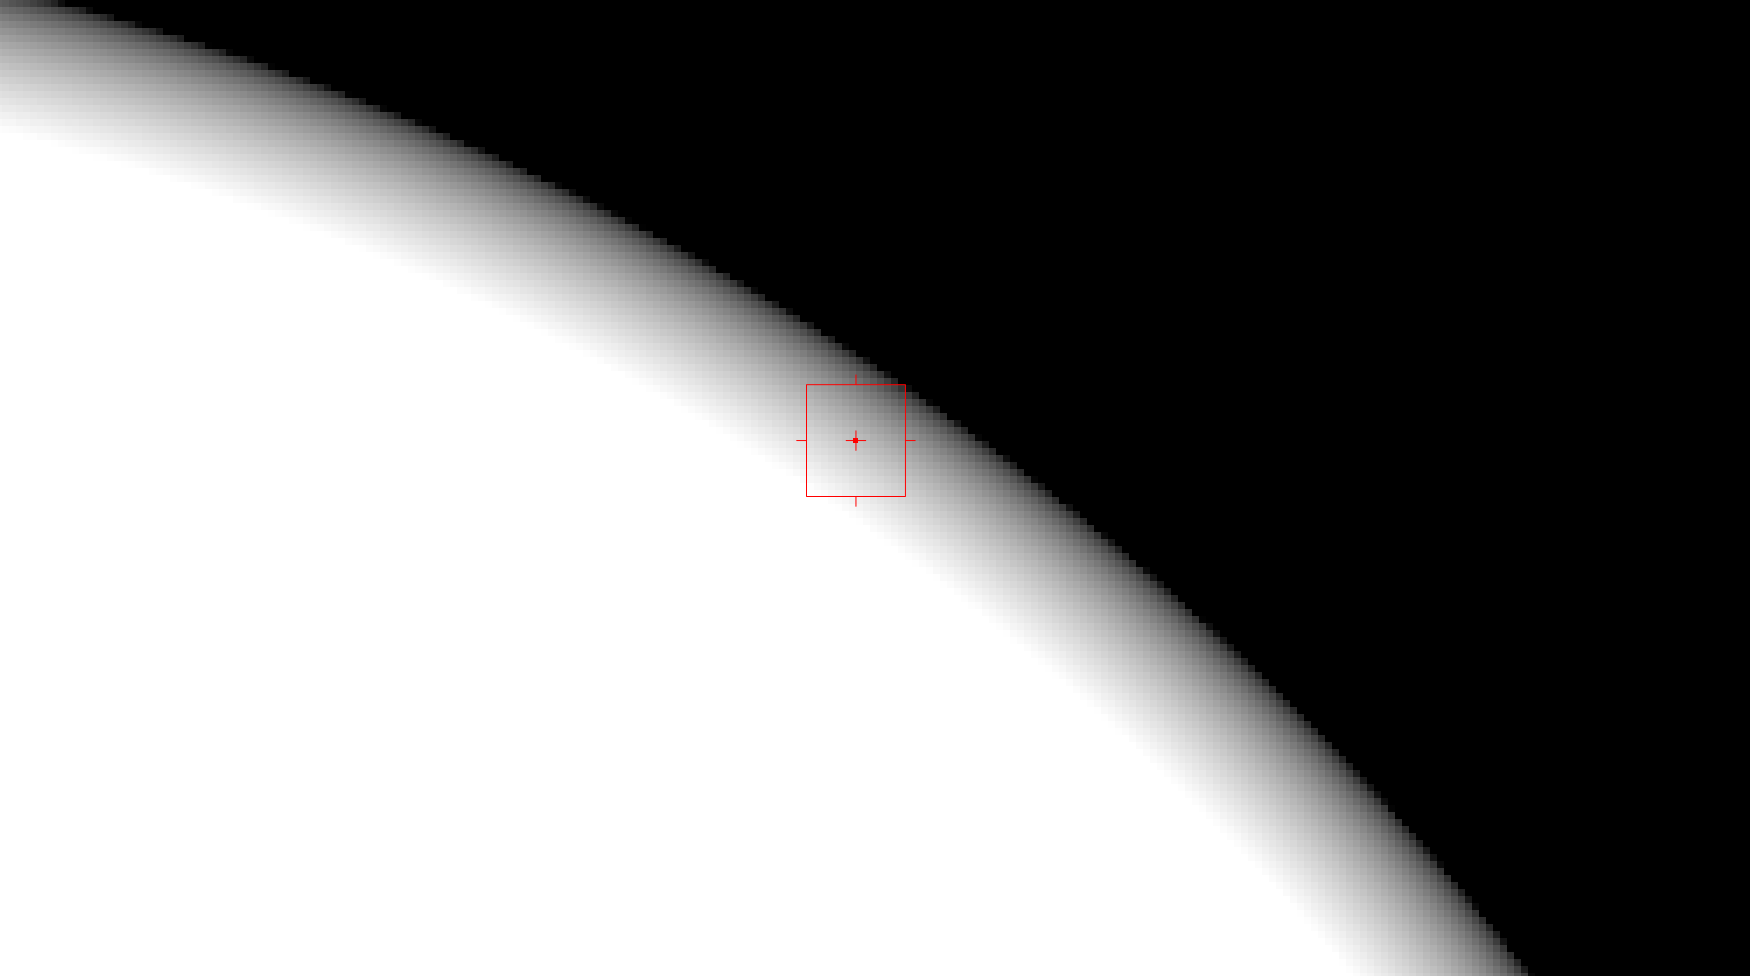
...into this mask:
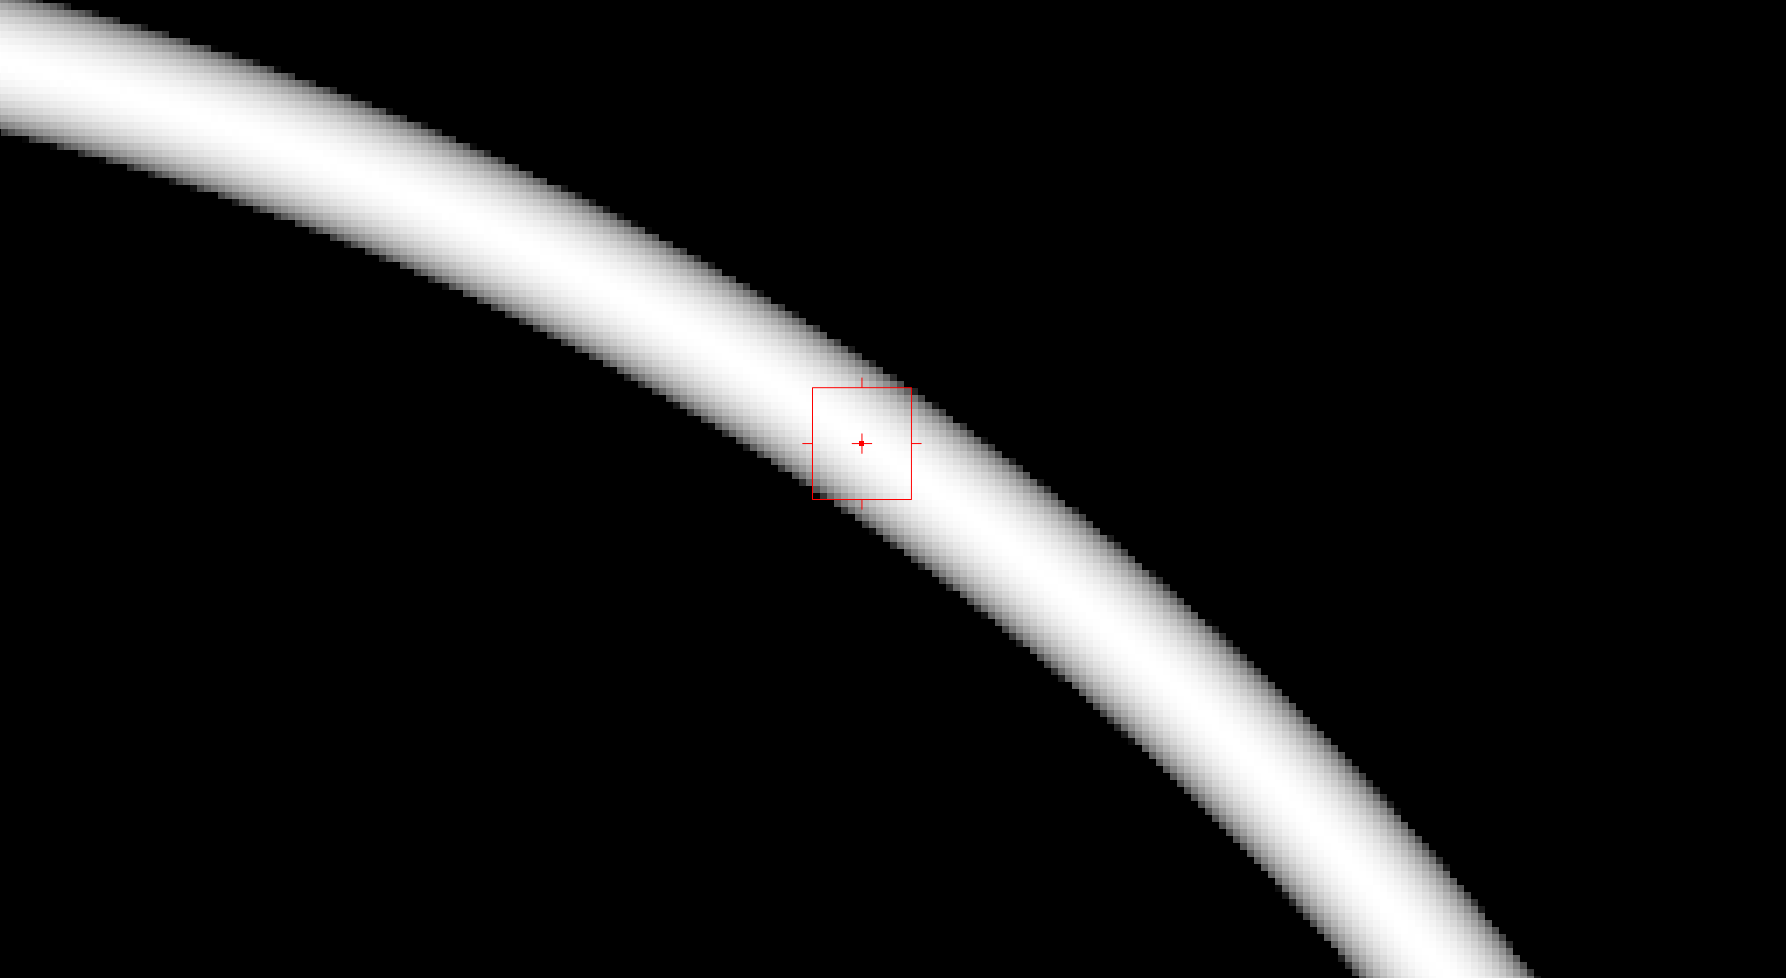
You can use fringe to adjust the grading on areas covered by the edges of your mask, for example to correct dark or bright fringing.
The Jig Is Up
As you might expect, these secrets are not only limited to the Grade node but apply to the other nodes in the Color menu as well, for example ColorCorrect, Exposure, HueCorrect, and Saturation. Give them a go – happy grading!
I hope you found these hidden features useful. For more Nuke tips & tricks, see Nuke.


