Manipulating Deep Data In Nuke
⭐ Manipulating Deep data opens up opportunities to do some cool and useful things in Nuke…

⭐ Manipulating Deep data opens up opportunities to do some cool and useful things in Nuke…
This article contains a Companions Exclusive Tutorial at the end
No Slice
Let’s say that you have a cave, a crater, a tunnel, or a corridor – some sort of space – that you want to haze up with smoke, fog, steam or similar. We’ll use a cave with smoke for this example. You might get an FX artist to simulate the smoke, or you might build a particle system yourself in Nuke, and use a Deep render of the cave to hold it out correctly.
The above approaches are great but time consuming. What if you instead set up a few cards with smoke elements along the length of the cave and hold them out by the Deep render of the cave?
Setting that up is easy enough, but when you hold out the cards by the Deep render of the cave, you might see something like this:
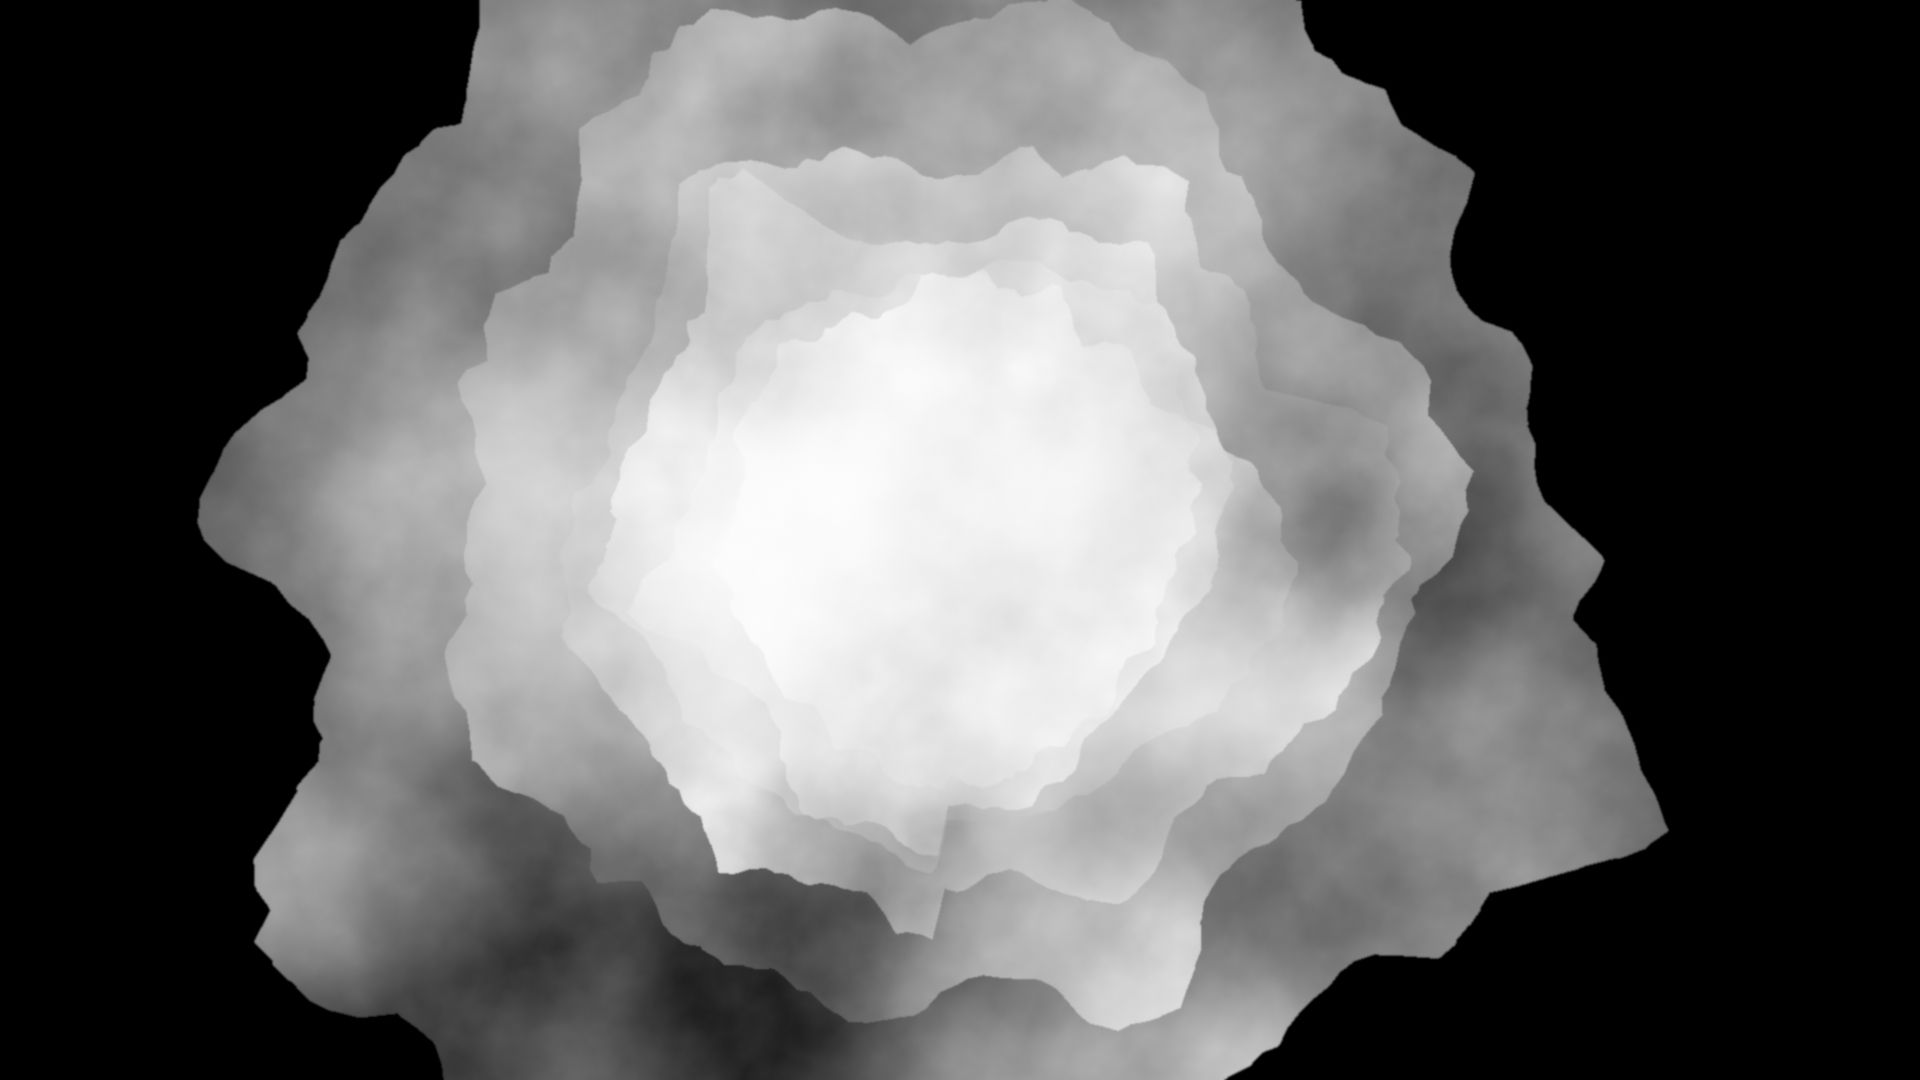
Six cards layered in depth with smoke elements, held out by a Deep render of a cave.
This steppiness is happening because the cards have no thickness in depth, i.e. the deep.front and deep.back values are the same. When holding the cards out by the cave, only extremely thin cross sections of the cave are actually interacting with each card.
Let’s look at how we can manipulate the Deep data of the cards and create thickness, in order to interact with larger cross sections of the cave. And turn the result above into something like the result below (using the exact same cards and cave holdout):
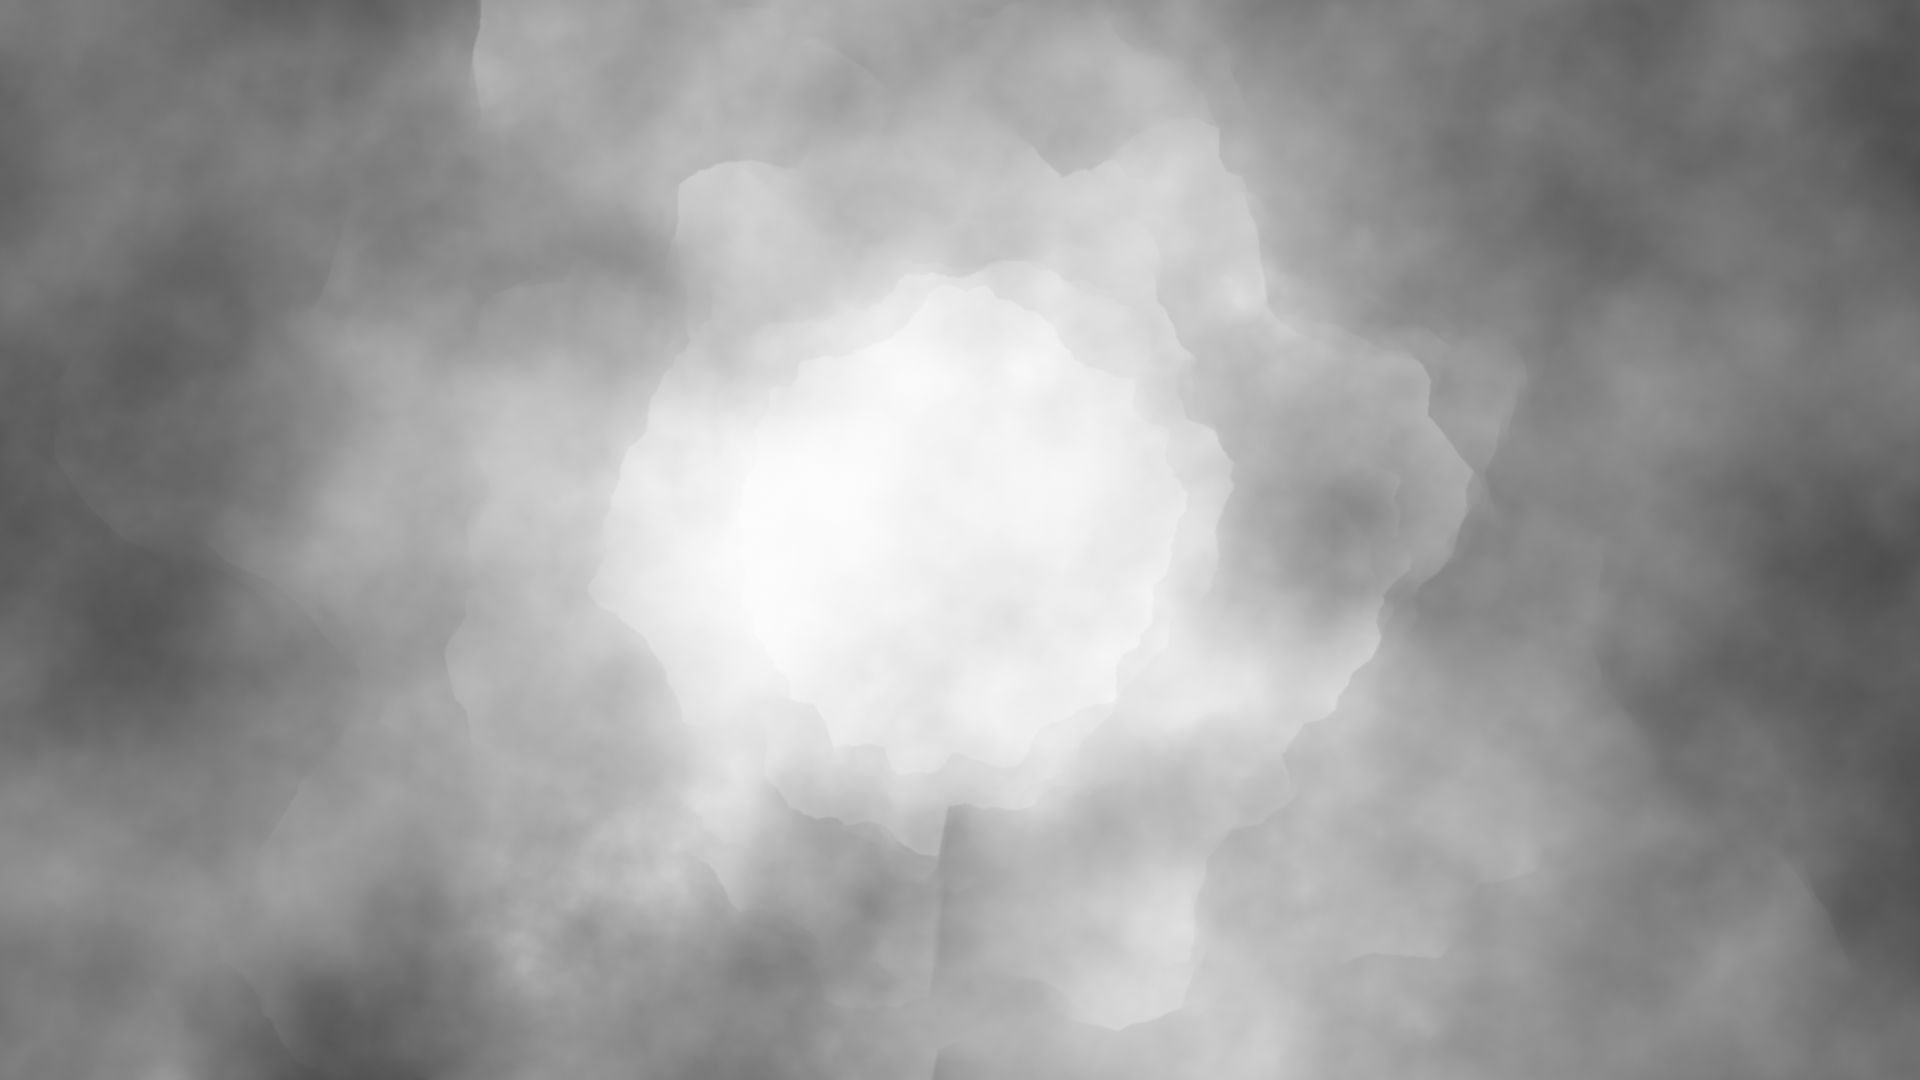
The same setup as before, except the Deep data of the cards has been manipulated to add thickness. Notice the much more detailed holdout corresponding to the actual shape of the cave and not just cross sections of it.
First things first; we need a cave.
Building A Cave
I don’t have a Deep render of a cave handy, so for demonstration purposes let’s create a provisional cave in Nuke and use its Deep data for holding out some cards with smoke elements.
Start by creating a Cylinder node. Adjust its radius and height, and rotate it to lay down flat, to get the general shape of a tunnel. Increase its rows/columns to something like 200 by 200 to give you more geometry to work with. You’ll need the extra polygons to get enough detail out of the displacement in the next step.
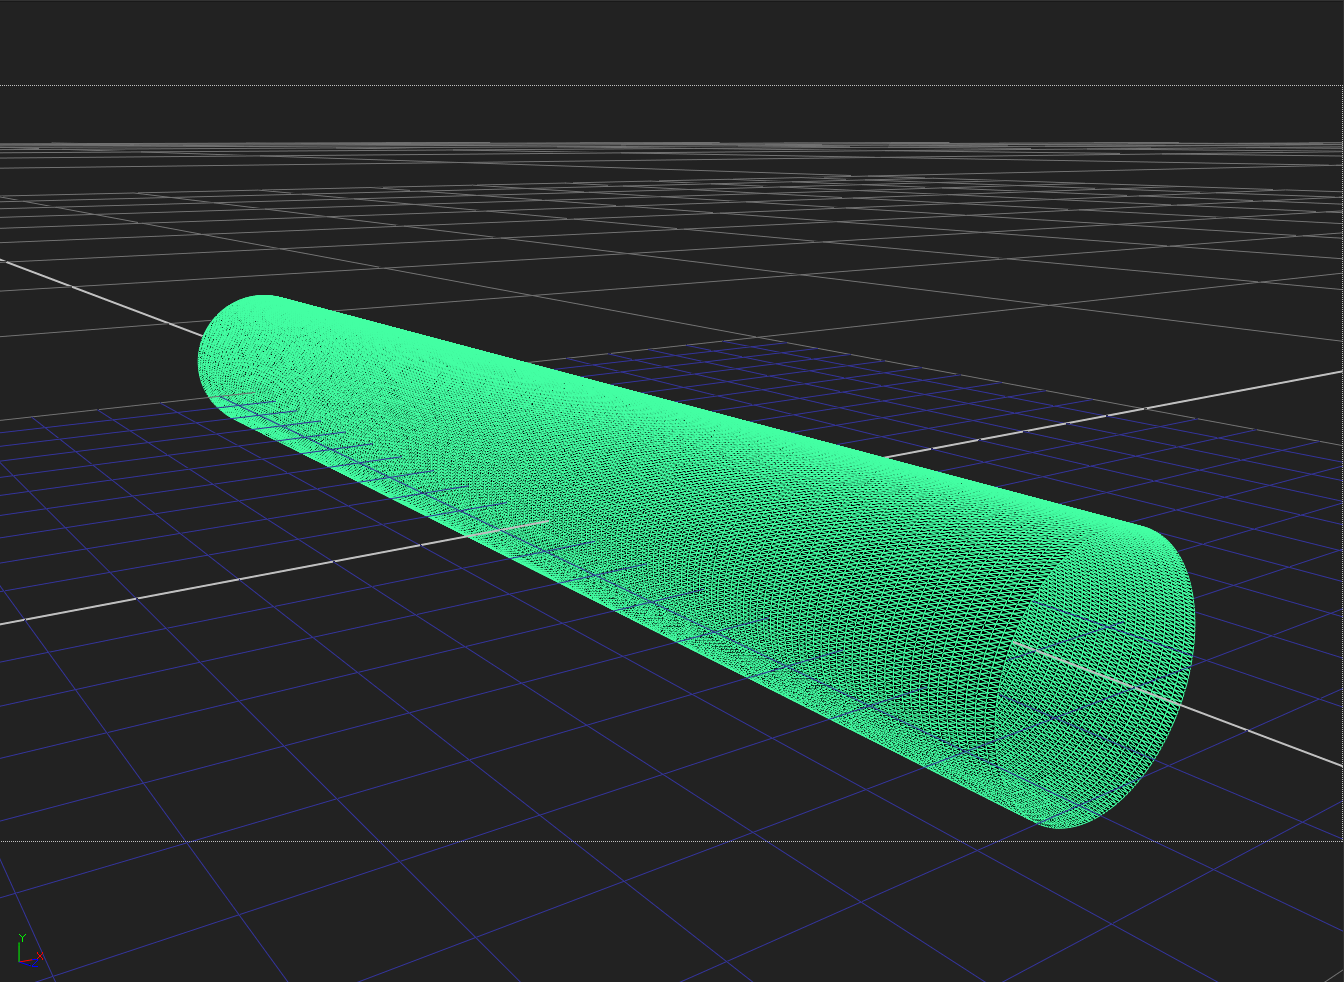
A Cylinder with plenty of polygons.
Connect a DisplaceGeo node to the Cylinder and connect a Noise node to the displace input. Adjust the x/ysize in the Noise node until the Cylinder looks like a cave-like structure.
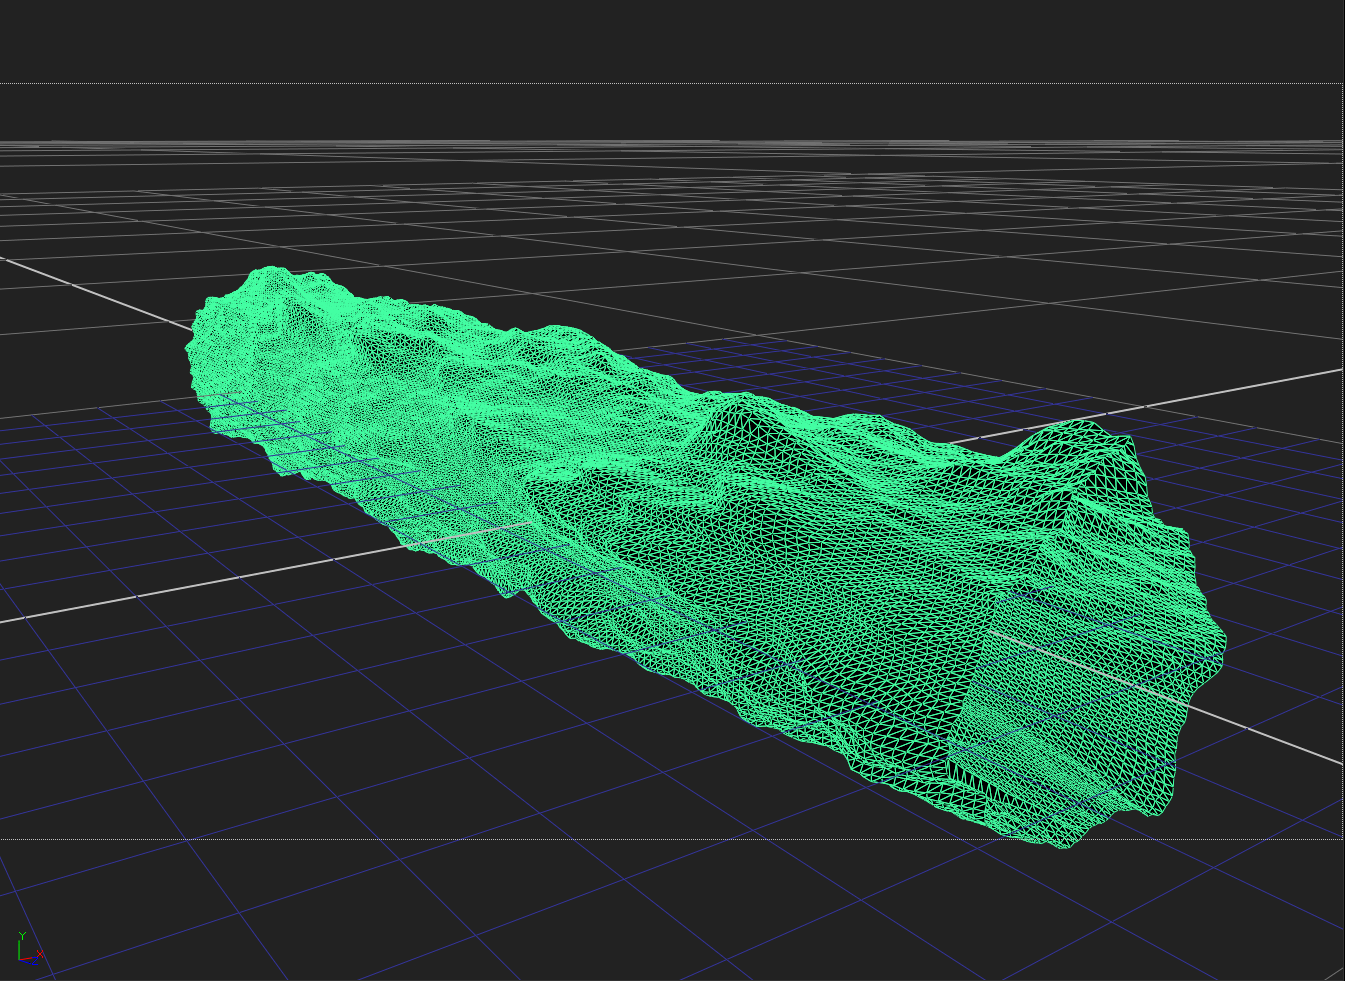
The Cylinder displaced by a Noise texture.
Setting Up The Smoke
Next, lay out some cards along the length of the cave and put smoke elements on them. For this example, I just put different Noise textures on each card.
Then, create a camera and point it down the cave towards the cards.
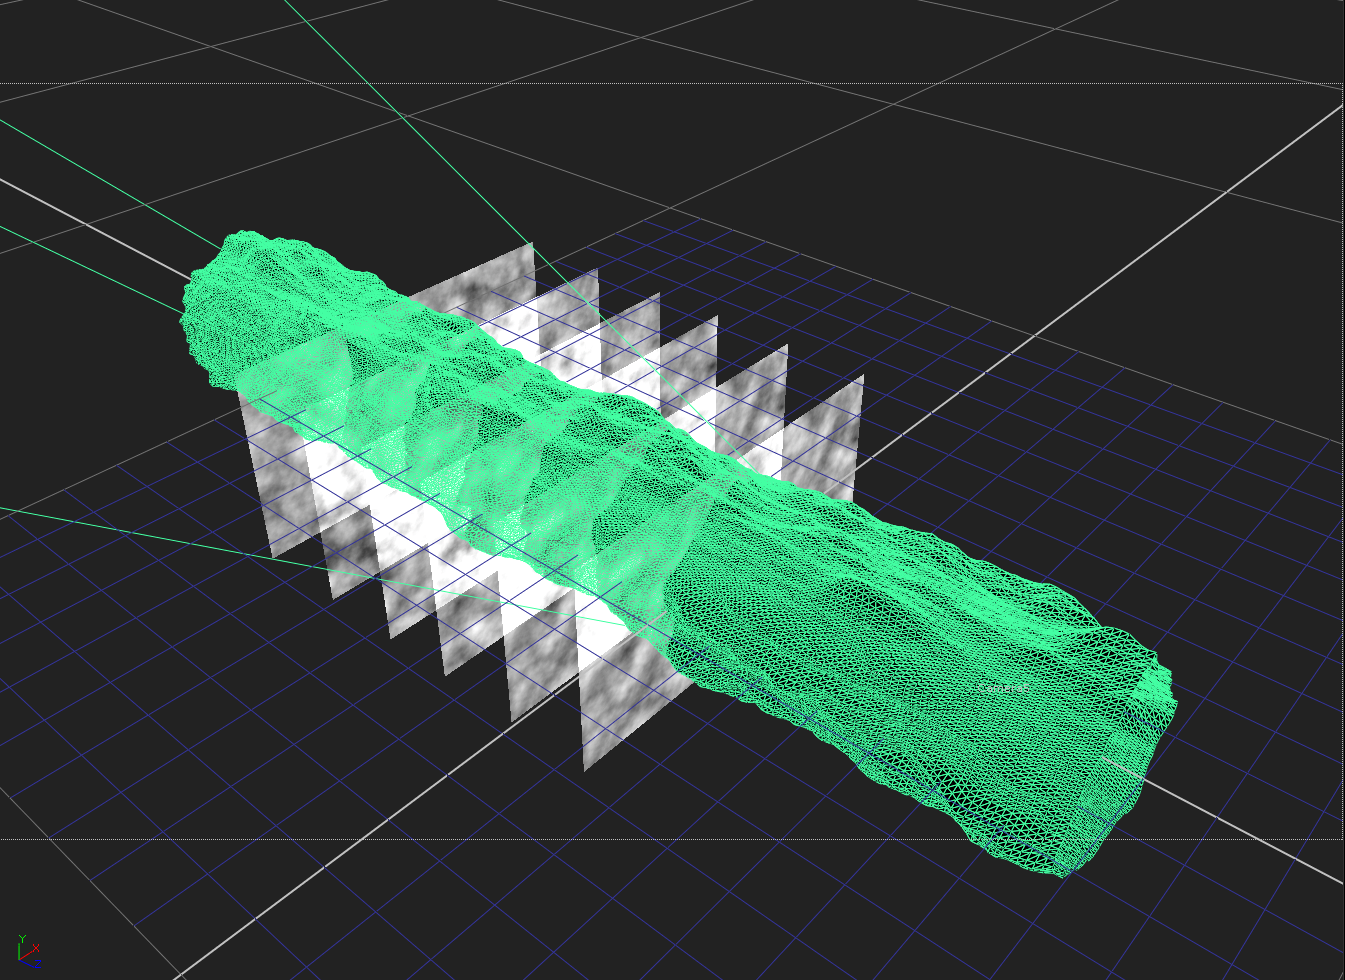
Six cards with smoke on them, laid out along the length of the cave in front of a camera.
💡 Notice where the cards intersect with the cave geometry in the picture above. Those are the cross sections that by default will be interacting with each card when you hold them out by the cave.
Next, connect all the cards to a Scene node and render them through a ScanlineRender node using the camera. The ScanlineRender will by default output Deep data.
Then, connect the displaced Cylinder to another ScanlineRender node to create Deep data for the cave. Using a DeepMerge node with the operation set to holdout, hold out the cards by the cave.
You should be seeing the same issue we encountered at the start of the article, where each card is only held out by a cross section of the cave. That is, it all looks a bit steppy and fake.
DeepExpression To The Rescue
This is where we start to manipulate the Deep data of the cards. Remember how the deep.front and deep.back values are the same on each card?
What we need to do is to push the deep.front value closer to the camera, and the deep.back value further away, in order to generate thickness in depth. We can do that with a DeepExpression node.
After the ScanlineRender node which is rendering out the cards, add a DeepExpression node. If we want to push the deep.front value 1 scene unit closer to the camera, and the deep.back value 1 scene unit further away from the camera, we can add the following expressions to the deep.front and deep.back fields in the DeepExpression node, respectively:
deep.front - 1
deep.back + 1
To make it more convenient for ourselves, though, let's add a Floating Point Slider to the DeepExpression node: Right-click on its properties and select Manage User Knobs… → Add → Floating Point Slider. Name the slider thickness and increase the maximum value to 10 or more. Then, change the previous expressions to:
deep.front - ([value thickness]/2)
deep.back + ([value thickness]/2)
That way, setting the slider to 1 will increase the thickness of the Deep by 1 scene unit. And it's much easier to change the thickness around to get the look that you want.
Animating the thickness of the cards from 0 to 10 scene units.
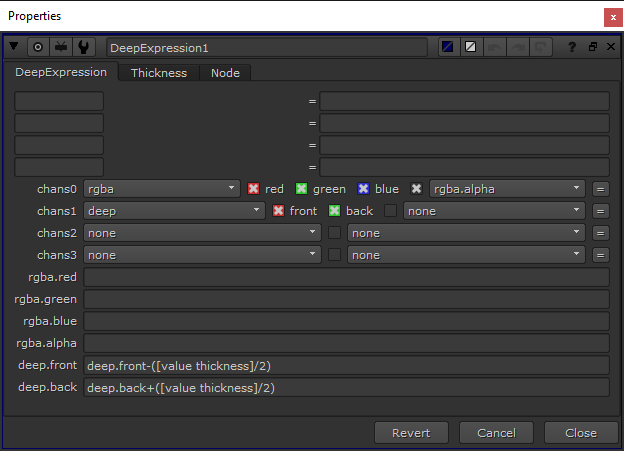
The DeepExpression node with the expressions needed to create Deep thickness.
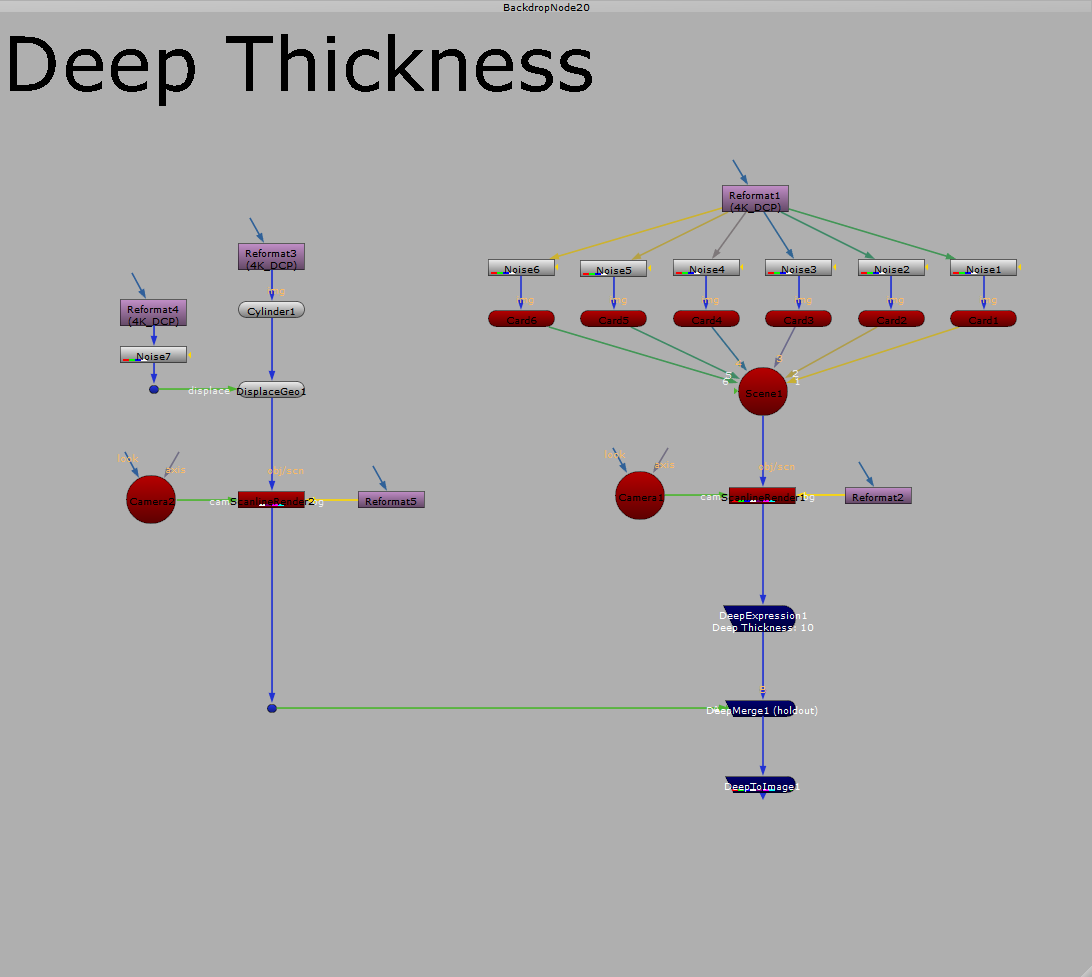
The setup in the Node Graph.
And that’s it; adjust the thickness slider until you are happy with the look.
I hope you found this tutorial useful. For more Nuke tips & tricks, see Nuke.
Companions Exclusive Tutorial: Deep Fade Out Near Camera
As a thank you to all Companions, I have added a bonus tutorial below.
If you wanted to move the camera through the smoke, or vice versa, you would run into another issue: popping. As the cards go past the camera, the smoke pops out of view in a way that doesn't look smooth or natural:
As the camera moves past the cards with smoke, they pop out of view.
This is true for any setup like this; when thin objects get close enough to the camera, they will suddenly go from in front of the camera on one frame to behind on the next. It happens with particle clouds, fog, steam, smoke; any situation where cards are flying past the camera.
Adding Deep thickness may help alleviate the issue, but not necessarily solve it. For that, there is a better method. Once again, the DeepExpression node comes to the rescue. By applying a few expressions to your render you can smoothly fade out the cards with the smoke elements when they get near the camera, and get a more natural transition:
With a DeepExpression node, you can smoothly fade out the smoke as it gets near the camera and avoid the popping.
Here is how to do it:


